

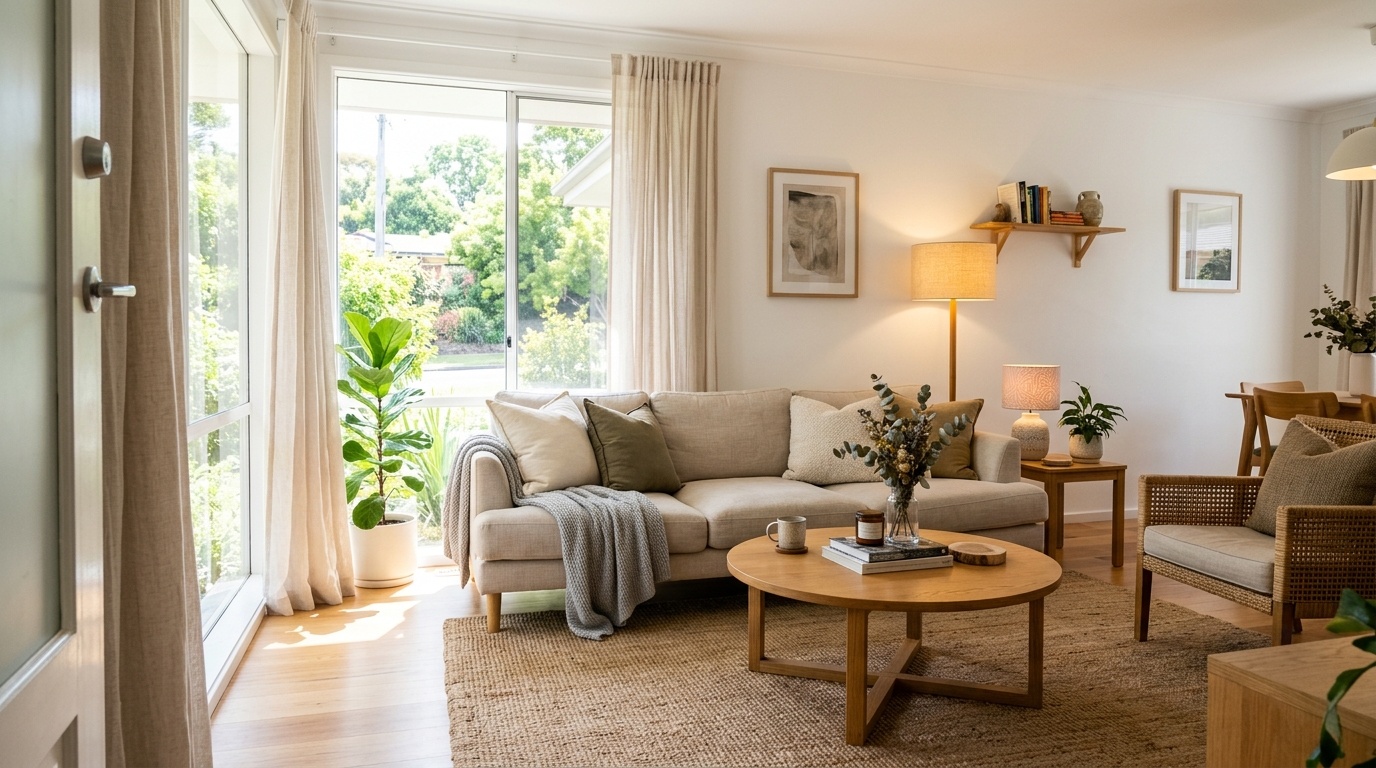
You refresh the search page, and three listings catch your eye. Same size. Same location. Same nightly rate. But only one has you clicking through. The difference? Light. Not the filter kind. The real, window-and-lamp, shot-at-the-right-time kind. And once you see it, you can't unsee it.
This is the airbnb photo lighting comparison gap that separates booked calendars from empty ones. Your staging might be flawless, your amenities better, your reviews glowing. But if your photos look dim next to the competition's bright, airy interiors, guests scroll past. Here's how to decode what top-performing hosts are doing differently, and how to close the gap without hiring a photographer.
Why Airbnb Photo Lighting Comparison Matters More Than You Think
When a guest opens your listing thumbnail in search results, their brain makes a snap judgement in under two seconds. Brightness signals cleanliness, space, and care. Dim rooms, even beautifully furnished ones, trigger the opposite: small, tired, outdated. It's not fair, but it's how visual decision-making works.
The click-through gap starts here. A living room photographed at 3pm with curtains half-drawn will lose to the same room shot at 10am with every window open and a strategically placed floor lamp. Same sofa. Same rug. Wildly different booking potential.
Pull up your three closest competitors. Open their listings side-by-side with yours. Count how many of their first five photos are flooded with natural light, versus how many of yours look shadowy or rely on ceiling lights alone. That ratio is your first diagnostic.
The Window-Time Strategy: What Top Competitors Know
Professional property photographers don't just show up and shoot. They check the orientation of every window, note the time of day each room gets direct sunlight, and block out a shooting schedule accordingly. The hosts beating you in search are either hiring pros who do this, or they've reverse-engineered it themselves.
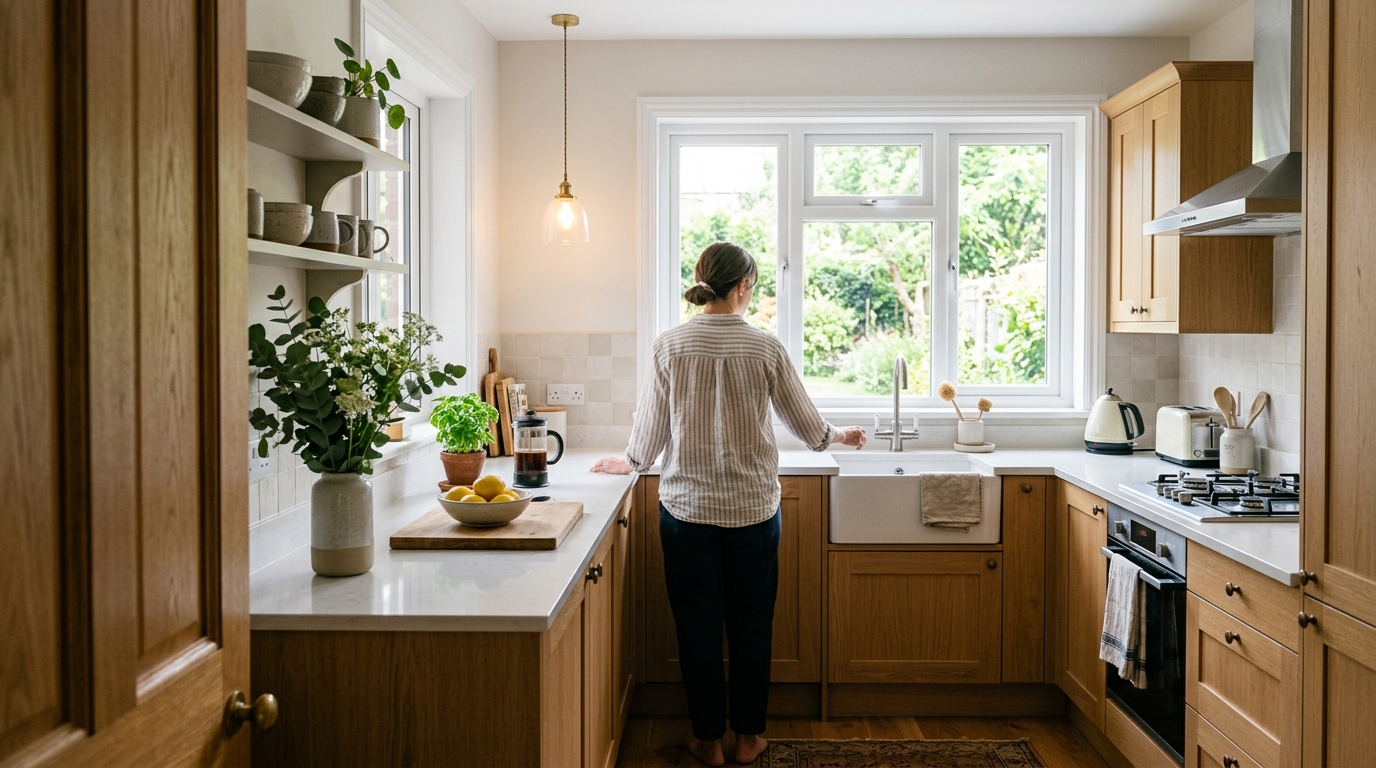
Here's the method: East-facing bedrooms get glorious golden light between 8am and 10am. West-facing living rooms glow from 4pm to 6pm. North-facing bathrooms (common in UK flats) stay evenly lit all day but never get direct sun, so they need every curtain open and a supplementary lamp to avoid looking dull.
Walk through your property with your phone camera open. Take a test shot of each room at 9am, 1pm, and 5pm. Compare. The difference will shock you. That's the time-of-day leverage your competitors are using, whether you realise it or not.
The Golden Hour Isn't Just for Sunsets
Morning light is softer, cooler, and more forgiving than harsh midday sun. If your hero photo (the first image guests see) is a living room shot at 2pm with blown-out windows and deep shadows in the corners, you're handing clicks to the host who photographed the same room at 9am.
South-facing rooms flood with light mid-morning and early afternoon, but by late afternoon in winter, they can look cold and grey. Time your shoot for when the room looks its absolute best, not when it's convenient. If you're comparing your photos to competitors and theirs feel brighter, check the light quality, not just the exposure slider.
The Lamp Placement Secret: Layering Light Like a Pro
Natural light is half the battle. The other half is what you do with lamps. Top-performing listings don't rely on a single overhead bulb. They layer: a table lamp in the corner, a floor lamp beside the sofa, a bedside lamp on each nightstand, all switched on during the shoot.
Why this works: Multiple light sources eliminate harsh shadows and create depth. A room with three lamps on (even during daylight) looks warm, inviting, lived-in. A room with just ceiling lights looks flat and institutional.
Pull up a competitor listing that feels brighter than yours. Zoom into their living room photo. Count the visible light sources. Table lamp? Check. Floor lamp? Check. Open curtains? Check. Now count yours. If the answer is one ceiling fixture and half-drawn blinds, you've found the gap.
The Practical Lighting Checklist for Every Room
Before you photograph a single room, do this:
- Open every curtain and blind fully. Not halfway. Fully. Even sheer curtains cut light by half.
- Turn on every lamp in the room. Bedside lights, desk lamps, floor lamps, the lot. Yes, even in daylight. They fill shadows and add warmth.
- Switch on overhead lights only if they're warm-toned LEDs. Cool white ceiling bulbs make rooms look clinical. If your overheads are harsh, leave them off and rely on lamps.
- Clean your windows the day before. Grimy glass diffuses light and makes bright rooms look hazy. This is a bigger difference than you think.
- Shoot perpendicular to windows, not directly into them. Pointing your camera at a window blows out the exposure and turns everything else into a silhouette. Angle across the room so the window is to the side, lighting the space evenly.
This isn't about expensive kit. It's about understanding how light behaves and working with it, the same way your competitors do. If you'd like an assessment of your current photos with specific suggestions to improve, Zugrow's free listing score analyses your photo quality, sequencing, and lighting, and shows you exactly where you stand against local competitors.
The Before and After Exercise: Auditing Your Own Listing
Here's a diagnostic you can run right now. Open your listing. Screenshot your first five photos. Now open a competitor with similar space, amenities, and price. Screenshot theirs. Place them side-by-side.
Ask yourself:
- Which set looks brighter overall?
- Which rooms feel more spacious?
- Where are the light sources in each photo (windows, lamps, both)?
- Are their curtains fully open while yours are half-drawn?
- Do their rooms have multiple lamps on, while yours rely on a single overhead?
If the competitor's photos feel lighter and airier, it's rarely the camera. It's the preparation. They shot at the right time, with every light source maximised. You can do the same with a smartphone, as long as you control the variables.
For more on how photo sequencing and room order affect click-through, see our guide on which room order converts best.
Airbnb Photo Lighting Tips: The Quick Wins You Can Implement Today
Let's break this down into immediate actions. You don't need to reshoot your entire listing today, but you can reshoot the worst-lit photos, the ones dragging your click-through down.
Identify Your Three Weakest Photos
Scroll through your listing. Which three photos look the dimmest, the most shadowy, or the least inviting? Those are your priorities. Ignore the rest for now. Focus wins.
Common culprits: the bathroom (often windowless or north-facing), the kitchen if it's shot in the evening, and the bedroom if it's west-facing and photographed in the morning before the sun reaches it.
Reshoot at the Right Time with the Right Setup
Pick a day with decent weather (you don't need blazing sun, just not heavy rain). For each of those three rooms, find the time of day when natural light is strongest. Set up like this:
- Open all curtains and blinds completely.
- Turn on every lamp in the room.
- If it's a bathroom, switch on the mirror light and any wall sconces.
- Tidy ruthlessly. Clutter absorbs light and makes bright rooms feel darker.
- Shoot from the doorway or corner, angling across the space so the window lights the room from the side.
Take five or six shots from slightly different angles. Review them on a laptop or tablet (phone screens lie). Pick the brightest, most spacious-feeling version. Upload it. Compare the before and after. The difference should be obvious.
If you're not confident about editing or cropping, our breakdown of the best Airbnb photo editing tools for UK hosts covers free and paid options that can help you fine-tune brightness and contrast without over-processing.
The No-Filter Rule: Why Authenticity Beats Over-Editing
You'll be tempted to crank the exposure slider to maximum or slap on a warm filter. Don't. Guests arrive expecting the room they saw in the photos. If your listing looks sun-drenched online but dingy in person, your reviews will call it out, and future bookings will suffer.
The goal is accurate brightness, not fantasy brightness. Shoot at the right time with the right setup, and you won't need heavy edits. A subtle lift in shadows and a slight warmth tweak is fine. Turning a grey room into a Mediterranean villa is not.
Airbnb Competitor Photo Quality: Closing the Gap Without Hiring a Pro
Professional photography isn't always the answer. Plenty of top-performing listings use smartphone photos, because the host understood the fundamentals: light, timing, angles, and layers. If your competitors have pro shots and you don't, you can still close the gap by mastering those four variables.
That said, if you've optimised everything and your photos still look flat next to the competition, it might be your phone camera's dynamic range. Older or budget smartphones struggle with high-contrast scenes (bright windows, dark corners). In that case, borrowing a friend's newer iPhone or Android flagship for an afternoon can make a tangible difference.
But before you blame the camera, exhaust the checklist: time of day, every curtain open, every lamp on, clean windows, decluttered surfaces, correct shooting angle. The vast majority of lighting gaps come from preparation, not hardware.
When to Consider a Photographer (and When Not To)
If your listing is a high-end property in a competitive market (central London, Edinburgh, Bath), professional photography is worth the investment. The return is measurable: higher click-through, higher average nightly rate, more instant bookings.
If your listing is a budget spare room or a secondary property in a low-competition area, the marginal gain from professional photos might not justify the cost. Instead, invest your time in learning the lighting and composition basics. The return on that knowledge compounds across every property you ever host.
Not sure where you stand? Zugrow's free Airbnb performance score evaluates your listing's photo quality, title, amenities, and pricing, and benchmarks you against local competitors, so you can make an informed call.
Airbnb Natural Light Photos: The Non-Negotiable for Hero Images
Your hero image (the very first photo in your listing) carries more weight than all the others combined. It decides whether a guest clicks through or scrolls past. And the single strongest predictor of a high-performing hero image is natural light.
Look at any top-performing listing in your area. The hero photo is almost always a bright, airy shot of the living room or a bedroom with sunlight streaming in. It's rarely the kitchen, rarely the bathroom, and never a dark hallway or a night-time exterior.
If your hero image is dim, shadowy, or relies on artificial light alone, swap it out. Reshoot your brightest, most spacious room at the time of day when it's flooded with natural light. Make that your first photo. The impact on click-through will be immediate.
For a deeper dive into how the first three photos influence guest behaviour, see our analysis of why guests skip your listing based on the opening trio.
The Photo Sequence Mistake That Undermines Great Lighting
You can nail the lighting in every single photo and still lose bookings if your sequence is wrong. Guests swipe through listings fast. If your brightest, most impressive photos are buried at position eight or ten, most searchers will never see them.
The fix: Front-load your best-lit, most spacious shots in positions one to five. Living room with sunlight pouring in? Position one. Bedroom with bedside lamps glowing and curtains open? Position two. Bright, clean kitchen? Position three. Save the detail shots (coffee machine close-up, bookshelf, bathroom sink) for later in the gallery.
This isn't just about lighting, it's about leveraging the lighting work you've done. If you've spent time reshooting rooms at the perfect hour, make sure guests actually see those photos before they bounce.
Our guide on why your competitor's photos beat yours breaks down sequencing strategy in detail, with side-by-side examples you can apply to your own listing.
The Lighting Audit: A 15-Minute Check You Should Run Quarterly
Lighting conditions change. Seasons shift. Trees outside your window grow and block light. Bulbs die and get replaced with different colour temperatures. A photo that looked bright in June might look dull by December.
Set a quarterly reminder to audit your listing photos against current competitors. Open three or four similar listings in your area. Compare brightness, light sources, and overall warmth. If your photos have slipped behind, reshoot the weakest two or three at the optimal time.
This isn't vanity. It's maintenance. Your listing is competing in real time against properties that refresh their photos, adjust their sequencing, and stay on top of presentation. A 15-minute quarterly check keeps you in the game.
Common Lighting Mistakes Even Experienced Hosts Make
Here are the recurring errors that show up in listing after listing, even from hosts with hundreds of bookings:
- Shooting too late in the day. By 5pm in winter, natural light is gone. Your living room looks grey. Reshoot in the morning.
- Leaving curtains half-open 'for atmosphere'. Half-drawn curtains cut light by more than half and make rooms look smaller. Open them fully.
- Relying on a single ceiling light. Overhead-only lighting creates harsh shadows and a flat, lifeless feel. Add lamps.
- Photographing directly into windows. This silhouettes everything else in the room. Shoot across the space with the window to one side.
- Ignoring the bathroom. Guests care about bathroom brightness and cleanliness. A dim, shadowy bathroom photo costs bookings. Turn on every light, open the window (or door), and reshoot.
- Uploading photos in the wrong order. Your brightest, best-lit shots must be in the first five. If they're not, reorder today.
Fix these six, and you'll leapfrog a significant chunk of your local competition without spending a penny.
The Bedroom Lighting Exception: When Cosy Beats Bright
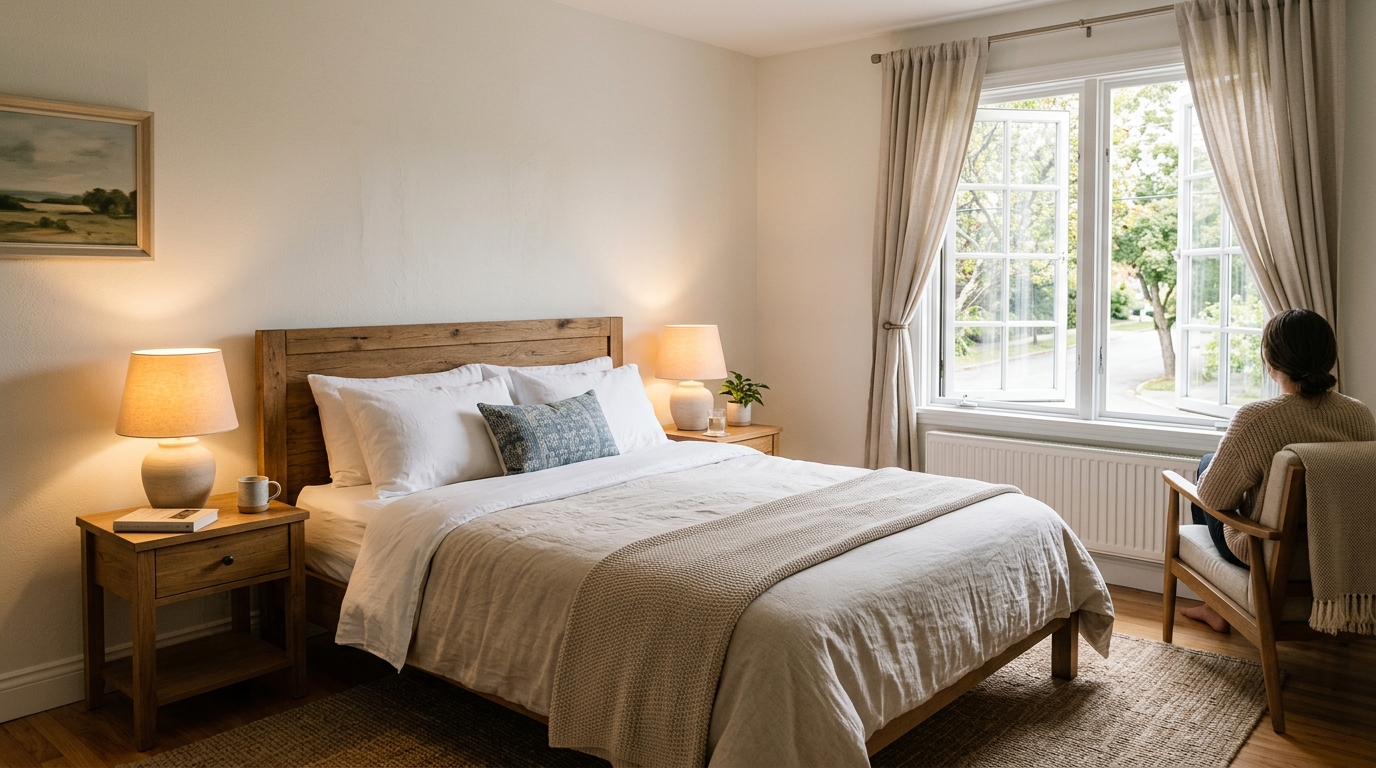
There's one room where the 'flood it with light' rule bends: the bedroom. Guests want bedrooms to feel restful, cosy, and calm. A bedroom photographed at high noon with blazing sun can feel clinical rather than inviting.
The balance: Shoot bedrooms in soft morning or late afternoon light, with bedside lamps on. The goal is warm and welcoming, not bright and stark. Curtains should still be fully open, but you're aiming for gentle, diffused light rather than direct sun.
For detailed advice on striking this balance, our guide to Airbnb bedroom photo lighting walks through camera angles, light placement, and how to make small bedrooms feel spacious without over-exposing.
How Zugrow Helps You Spot the Lighting Gap
When you run your listing through Zugrow's free performance score, the photo analysis flags common lighting issues: dim hero images, poorly sequenced bright shots, and rooms that would benefit from a reshoot. You'll see how your photos compare to top-performing local competitors, with specific suggestions on which images to replace and why.
It's the fastest way to get an objective, data-led view of where your listing stands and what to fix first. No guesswork. No generic advice. Just actionable insights you can implement today.
Your 7-Day Lighting Improvement Plan
Day 1: Screenshot your first five photos and three competitor listings. Compare brightness and light sources. Identify your weakest photo.
Day 2: Walk through your property at three different times (morning, midday, late afternoon). Note which rooms look brightest when.
Day 3: Clean all windows. Replace any dead bulbs. Add a table or floor lamp to any room that feels dim.
Day 4: Reshoot your weakest photo at the optimal time of day, with every curtain open and every lamp on.
Day 5: Compare the new shot to the old one. If it's better, upload it. If it's not, reshoot from a different angle.
Day 6: Review your photo sequence. Move your three brightest, most spacious shots to positions one, two, and three.
Day 7: Run a free listing audit at Zugrow to see how the changes have improved your overall score.
One week. Minimal cost. Measurable difference. The lighting gap isn't a mystery. It's a checklist. And now you have it.
Frequently Asked Questions
How do I compare my Airbnb photo lighting to competitors?
Open your listing and three similar local competitors side-by-side. Screenshot the first five photos from each. Compare brightness, visible light sources (windows, lamps), and overall warmth. If their photos feel airier and lighter, note the time of day they likely shot (look for sun angle and shadow direction), count how many lamps are visible, and check whether curtains are fully open. That's your baseline for improvement.
What time of day is best for Airbnb photos?
It depends on the room's orientation. East-facing rooms look best between 8am and 10am. West-facing rooms glow from 4pm to 6pm. South-facing spaces are brightest mid-morning to early afternoon. North-facing rooms stay evenly lit all day but need supplementary lamps to avoid looking dull. Walk through your property at different times and photograph when each room is at its brightest.
Should I use filters or editing on my Airbnb photos?
Light editing is fine: lifting shadows slightly, adjusting warmth, and correcting exposure. But avoid heavy filters or unrealistic brightness boosts. Guests will notice the difference when they arrive, and your reviews will suffer. The goal is to present your space accurately at its best, not to create a fantasy version. Shoot at the right time with proper lighting, and you'll need minimal editing.
Do I need a professional photographer for my Airbnb listing?
Not necessarily. If you understand lighting fundamentals (time of day, multiple light sources, open curtains, correct angles), a modern smartphone can produce competitive photos. Professional photography makes sense for high-end or highly competitive listings where the marginal gain in click-through justifies the cost. For most hosts, mastering DIY lighting delivers better return on investment.
How often should I update my Airbnb photos?
Audit your photos quarterly. Compare them to current top-performing competitors in your area. If your images look dimmer, less bright, or outdated, reshoot the weakest two or three. Seasonal light changes, tree growth, and evolving local competition mean a photo that performed well six months ago might no longer be competitive.
Can I improve photo lighting without buying new lamps?
Yes. Start by opening every curtain and blind fully, cleaning your windows, and shooting at the time of day when natural light is strongest in each room. Use the lamps you already have, and make sure they're all switched on during the shoot. These zero-cost changes will make a bigger difference than you expect. If you still need more light, a single affordable floor or table lamp in a dim corner is a better investment than expensive editing software.
Ready to see how your listing measures up? Get your free Airbnb performance score at Zugrow and discover exactly where your photos, pricing, and title stand against local competitors. No obligation. Just actionable insights you can use today.